Pages

Thursday, June 26, 2014

A Craft A Week: Week 22 - Zucchini Cookies

I was in the Café at work and there were two huge ball shaped Zucchini's up for grabs.  I wasn't sure what to make with one, but I took one home anyway.
 The first recipe I made, or tried to make, was Zucchini Fritters. 
http://damndelicious.net/2014/04/02/zucchini-fritters/
Chef Hubby told me I should wait for him and we would make them together (meaning he would make them using his own recipe), but I wanted to play!  So I made them anyway.  I followed the tutorial on the website, starting with grating the big zucchini ball.
I let it sit in the colander to drain for about 10 minutes, but did not have a dish cloth to get them completely dry.  That's where I made my mistake.
Next I mixed in the other ingredients, scooped a glob out and plopped it on to the hot skillet.  I flattened them down, flipped 'em over, and tried to serve them to the kids.
Blake was the first to try one.  In fact he was hovering over the stove with me while I made them.  He pretended that they were amazing and crispy.  Chase was next, he barely ate the smallest piece of crispy edge and smiled and made an "mmmm" sound, but his face told me otherwise.  I ate one, it wasn't crispy enough, but I could tell I would love them if I had drained the zucchini right.
 
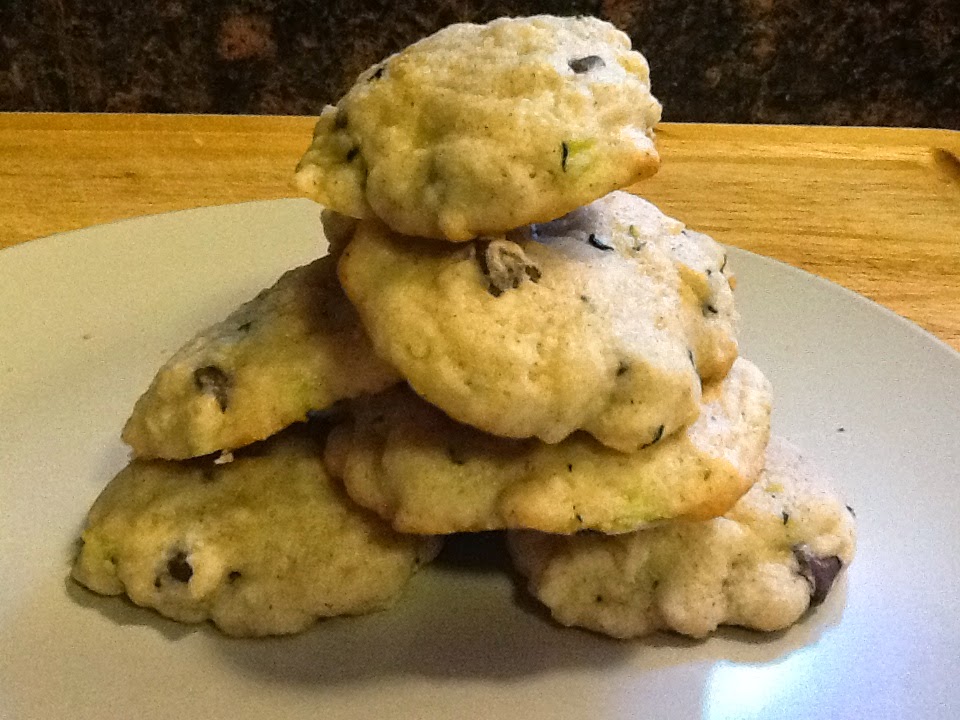
The next recipe I tried was the Zucchini Cookies and I ROCKED 'EM!
The recipe came from http://www.littlehouseliving.com/zucchini-cookie-recipe.html#_a5y_p=1595249 via Pinterest.  I followed it exactly as described,  First I mixed together the butter, sugar, egg, and vanilla.  Then I added in the grated zucchini.  Mix, mix, mix.  Then in goes the dry ingredients: flour, baking powder, cinnamon, and salt.  Last stir in the chocolate chips.
Drop teaspoon-size blobs onto a cookie sheet (I didn't grease mine, I used parchment paper).  Bake at 350F degrees for 15 minutes or until just slightly brown. 
Take them out and place them on a cooling rack and watch the kids eat them faster than you can stack them up.  Hubby said they were delicious.  Chase and Blake pigged out on them all night.  Reed shoved two in his choppers at one time.  We even ate them at breakfast the next morning.  I am definitely making these again!

Monday, June 16, 2014

A Craft A Week: Week 21 - Chum Tube

Happy Father's Day!
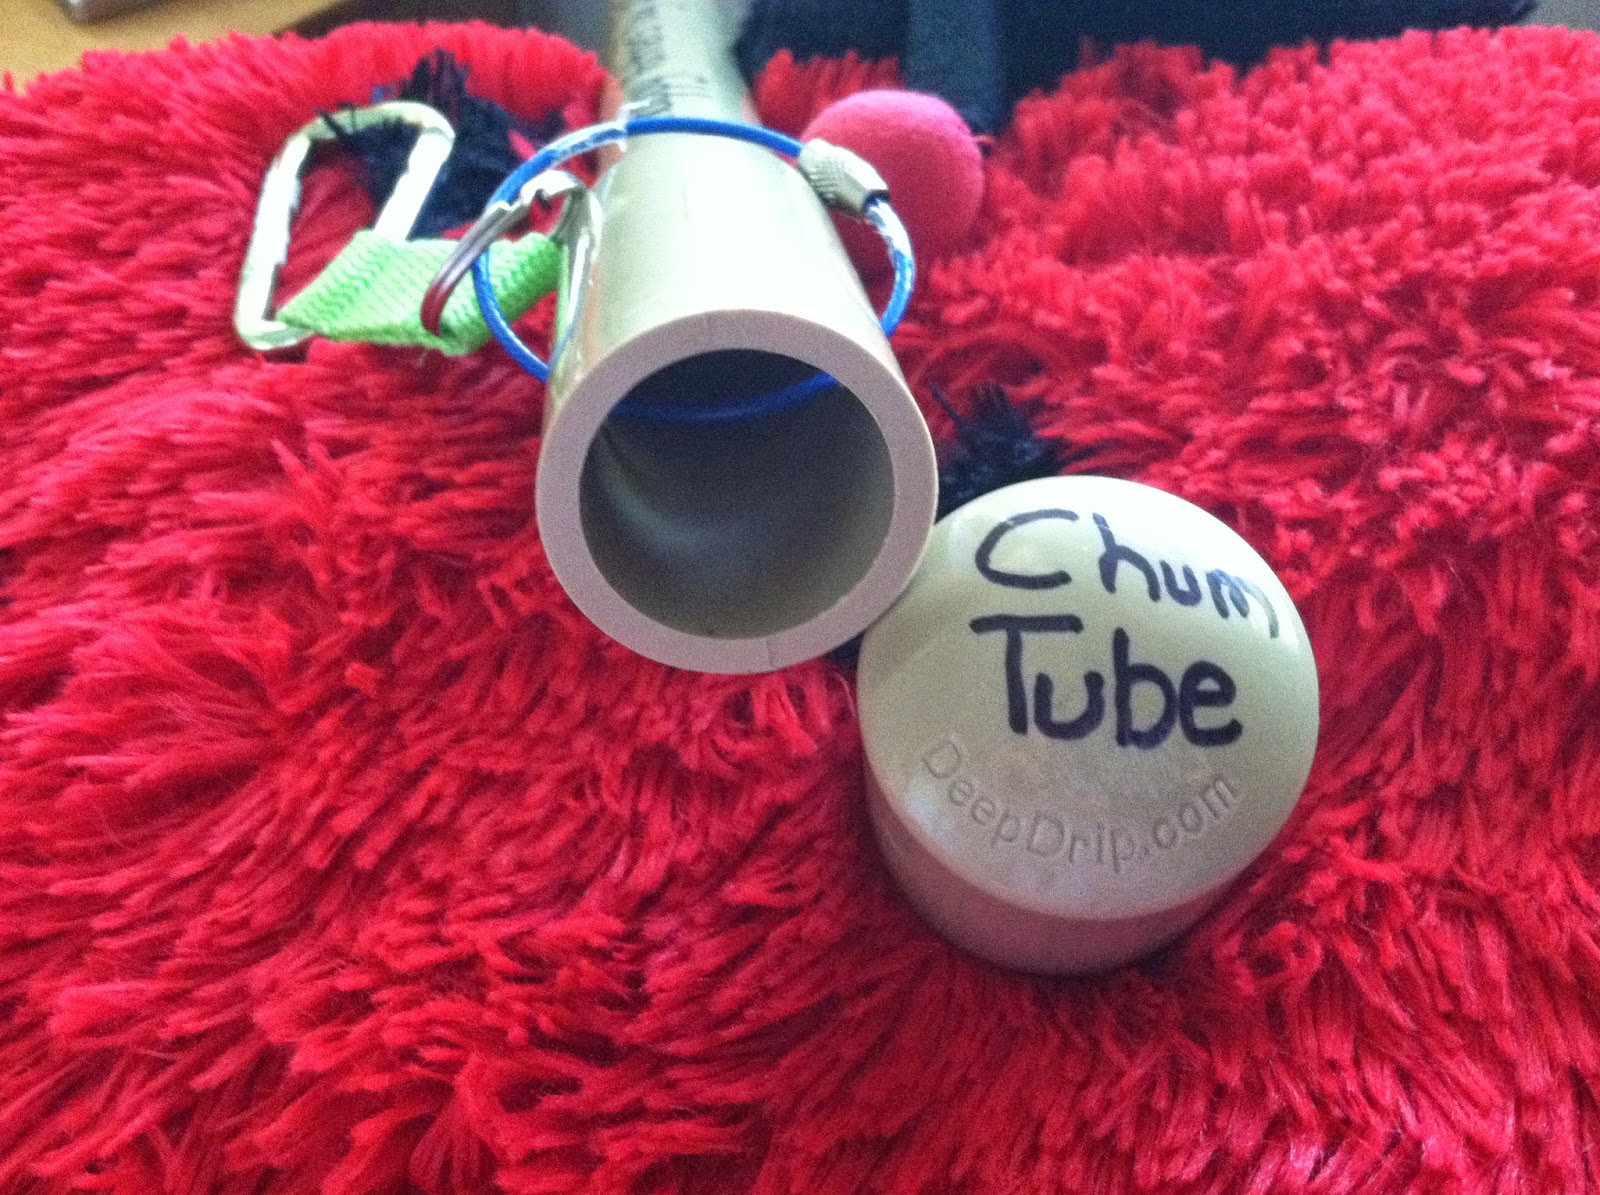
Here's a Chum Tube!

I never thought I would say that in my life.
So I'm not even sure how I found it, but I saw this picture on Pinterest (insert smiley face here) and I followed the website to find out how to make one.

http://selfrelianceworkshop.com/2013/06/22/diy-fishing-gear-pvc-chum-tube.aspx
I read the instructions and figured I could pull it off.  Chase, Blake, Reed and I went to Orchard Supply Hardware (OSH) and looked around.  I realized I didn't have the tools or patience to do it, but I found this!  It's a Deep Drip Tree Watering Stake!  It already has holes and a top that comes off.
http://www.deepdrip.com/
We searched around for what we could use to attach the line to the tube.  Looking at the picture from the tutorial we found a key clip and key cable ring (similar to the pictures below).
Here are pictures of our finished gift!


I think it turned out AWESOME!  It might have been more expensive than the one in the tutorial, but it was easier for a mom with 3 kids and no knowledge of power tools to make.  YAY!
 
Hubby loved it and is looking forward to using it!
The kids and I could barely wait to give it to him, we were so excited with it.  What do you think?  We haven't used it yet so I don't know yet how it will work.  Any fisher-peeps out there with some ideas?
 
Take care!
Momma Lady Beetle 

A Craft A Week: Week 20 - Sheer Curtain

I finally "finished" my sheer curtain for my ocean bathroom.  One of my next projects will be a curtain tie to pull it up so it doesn't look so long.  I didn't want to cut it shorter because when I tie it back it looks real cute with how long it is.

I was surprised with how easy this was!  This was my first curtain.
 
STEP ONE: Create a double-fold hem on all four sides.  I didn't measure, I eye-balled it.  First fold over the raw edge about a 1/2 inch, wrong sides together.  Then, fold it over again a 1/2 inch to encase that raw edge inside of the hem.  Pin in place.
 
STEP TWO: Sew a hem on all four sides.  Sew close to the fold about an 1/8 inch in.  Make sure to backstitch at the beginning and the end and pull out the pins as you go.  Don't break a needle!
STEP THREE:  Create a casing for the curtain rod at the top.  In the first picture I show, you can see the casing.  Just fold it over, wrong sides together, as big or as small as you want it.  I wanted mine rather large so I could see it in the window and so that I could eat up some of the length.  Again, I didn't measure.  Once you have it the size you want, pin in place and sew.  I sewed along the hem line I already had from the folded down top edge.  Remember to backstitch and pull out your pins as you go.
 
Not a great photo at all...
STEP FOUR: Insert the rod.  I purchased a tension rod from Amazon.com  I measured my window and found a cheap rod that was the right size.  Since it will be hidden within my curtain and behind my foam valence board I didn't need anything fancy.
http://www.amazon.com/gp/product/B000M3WXM8/ref=oh_details_o04_s00_i00?ie=UTF8&psc=1
STEP FIVE: Hang!
STEP SIX: Stand back and be proud of your work!

Chase told me "Thank you" for making the curtain.  Maybe I wasn't the only one that felt weird about sitting on the pot and having people walk past the window behind you.

Now I just need that curtain tie.


Saturday, June 7, 2014

A Craft A Week: Week 19 - Nice Catch!

I overdid Photoshop again.  I guess I need to spend a week on Photoshop as a craft.

Lately I've been all about fish décor.  I saw the below item on Etsy and had one of those thoughts "I could make that!"

https://www.etsy.com/shop/DarlingSavage
STEP ONE: Rummage through all your scrap fabrics.  I pulled out any that were in the blue family and were big/wide enough for a fish to be cut from.
STEP TWO: Cut out your fish.  I didn't make a pattern, so no two fish are exactly alike.  If I were to do it over again, I would probably make a pattern with better fins and make the fish smaller.
STEP THREE: Iron your fishies.  Might as well do it right, right?

STEP FOUR: Pin your fish wrong-sides together.  Now it is time to sew!  Go to your craft room... what? You don't have a craft room either?  Then pull out your sewing machine from your guestroom closet and set it up at the kitchen table while wishing you had that all cool craft room you see on Pinterest all the time.
STEP FIVE: Sew most of the way around the fish, totally skipping the fins, and just before you make it all the way around stuff a little cotton fiberfill stuffing in your fishies body, just a little though.  Then sew the rest of the way to close 'em up.  (Reed wanted to make sure the fish were ok so he put on Angry Bird Band-Aid on one).
STEP SIX: Add button eyes.  If you are a craft hoarder like me you probably have a collection of buttons somewhere.  I picked mostly white buttons that have the four holes so that I could sew an X in the eye like a dead fish (eewwww!!!)

STEP SEVEN: I used some Jute cord to string my catch up on my driftwood.

STEP EIGHT: Hang.  I still haven't done this part.  I want to buy some of that Command Tape and hang it in my Livingroom.

I like them!
I love them!
They are funny and cute!
I'll update the blog once I hang them so you can see how they look on the wall.

Love ya!
Momma Lady Beetle