Pages

Tuesday, February 25, 2014

A Craft A Week: Week 6 - Tarn (+Pillow)

Ever had Tarn Burn?  It's when you are so excited to finally make Tarn that you burn yourself with it in the process.  Only a true crafter (or idiot) can do it.  I did it.  So it went like this... "Hey Dawn, come make Tarn with me in my cubicle instead of working!"  Dawn came gleefully skipping over "tra-la-la, tra-la-la".  We grabbed the white T-shirt out of the pile and said, "What do we do now?"

That's when we dug back through all our Pins on Pinterest (were you expecting something else?) and found the DIY instructions from www.letbirdsflyblog.com


STEP A) Rummage through your husbands shirt drawer for any T-shirts that have holes or stains or you just don't want to see on his body.  They need to be T-shirts that DO NOT have side seams.  Most men's L or XL+ T-shirts do not have side seams.
 
STEP B) Ask him sweetly, batting your eyelashes might help, if you can savagely cut up all his favorite T-shirts you found.
 
MATERIALS) T-shirts, cutting mat, acrylic cutting ruler thingy to cut straight lines, and a rotary cutter (this will be your best friend with this craft; Dawn and I first tried scissors. Ouch.)
 
 
STEP ONE) Lay one of your T-shirt Treasures down on the cutting mat and smooth it all out.  You are going to cut the shirt from smelly armpit to smelly armpit.  Also cut off the bottom seam.  If you are a craft hoarder like I am you will look at the cut off portions and immediately think you can make something else with them.  If you are sensible, you won't think that.
 
 
STEP TWO) Leaving about an inch margin on one of the uncut sides, fold up the remainder of the shirt one or two times so you won't have to cut as far.  Then cut about 1-inch strips as shown below (Reed wanted a picture with his car in it).
 
The red shirt photos are from www.letbirdsflyblog.com because my pictures weren't as good as hers.
 
STEP THREE) Unfold the "shirt" to open the uncut margin.  Make diagonal cuts from strip to strip.


STEP FOUR) Starting with one end, stretch the strips tightly, but don't rip it like I did.  This will help the fabric roll in on itself and make your Tarn longer.  This is also where I gave myself Tarn Burn hands, by sliding the Tarn through my palms, going too fast.  Perhaps garden gloves?  Perhaps thicker skin?


Project complete!  What should I make with all my Tarn?  That's for another week I suppose.
 
+ Pillow:
I won't go in to this too much, but I finished that other finger-knit pillow I had wanted to make.


Too many pillows!!  I love it!

Final Thoughts:
I can't think of any way to do this better other than protect your hands and don't pull so hard you rip the fabric (teeheehee).  I can't wait to start using it for something.  Chase and Blake didn't have any input on this project.  Reed just kept finding them and rolling them around until they unraveled.  Hubby let me cut his T-shirts but he didn't see how he gained anything by this: he lost T-shirts and I gained free Tarn.  I see the benefits!
 
My Next Project:
Framing.  I have several frames around the house that don't have pictures in them (wedding presents, etc.), I have several favorite photos not even printed, and also some artwork that is rolled up in tubes not displayed.  Silliness!  I am going to attempt DIY Matting, maybe Fabric or Paper Matting, here are some inspiration photos:
 
 
As always, I would love for you to join me.  I would love to be inspired by your crafts. Send me photos or comments when you can.  Cheers!


Tuesday, February 18, 2014

A Craft A Week: Week 5 - Valentine's Day Cards

"I Fall To Pieces...."  Pieces was my theme for Valentine's Day this year.  I made cards (or postcards) for my husband and kids and tried to center my gifts or love-silliness around it as well.  If you read my posts on Facebook I told you about how I played Patsy Cline's song really loud until my husband came downstairs in the morning to see what I was up too.  I took my youngest son to see The Lego Movie and then bought him and my middle son some Legos.  Lots of pieces!

Here are the pictures that were my inspiration for my cards (mostly found on Pinterest... of course):


Then I found my puzzle... errr... ImpossiPuzzle :)
There was this calendar store going out of business at the mall and I snagged this for like 70% off or something.  Yay!


The ImpossiPuzzle is fun little chocolates grouped in heart shapes, perfect for my Valentine's cards.  I really lucked out, it was the last one.
 
Then I dug through all my old Hallmark cards to re-use them for my craft.
 

I found ones that had borders, or pink and red colors, etc. to add to my design (make sure you read the top card about Dorothy, it's funny, I almost wanted to keep it... it was also one of the last Valentine's I got from my Mom, but this way I am sharing her love again).

I used some old leftover scrapbook paper to cover the front images I didn't want to see.


Then I glued on my puzzle pieces, added my words (I hate my handwriting) and TA-DA!  I made lovey-dovey cards for my family!
 
 
Below are some pictures of previous years cards.  This first one I made for Reed last year (2013), but I made basically the same card for each of the boys and Hubby.


This is the card I made in 2012, again they all received the same basic card:
 

If I was able to make them better...
I would have practiced my handwriting before writing on the cards.  That is the only thing I don't like about them, but on the other hand, it makes them more personal.

Final thoughts:
Hubby was impressed I made them and said it wasn't fair that I got to get off cheap for Valentine's Day because I'm crafty (He said it in a teasing sneering voice that made me laugh).  Chase loved the card and thought the theme was really cool.  Blake liked his candy.  Reed wanted his puzzle pieces back and shared his candy with Daddy and Mommy.

My Next Project!
To be honest, I am not sure yet.  I want to finish the other pillow I didn't get to finish a few weeks back (the LOVE finger knit pillow) and I was thinking I should work in a "For Charity" craft every few weeks, here are some ideas for that: pillow cases, fleece tie blankets, finger knitted scarves, Beads of Courage Bead Bags (I started this one last year and never finished).  I also want to make some t-shirt yarn so that I can make something out of it.  I have different craft ideas for St. Patrick's Day and Easter and the Donut Dash fun run we are doing in March.  But I'm not sure what to tackle this week.  Hmm... maybe finish the other pillow and do the t-shirt yarn.  Here is my inspiration on the t-shirt yarn:

 
As always, I would love for you to join my challenge of a craft a week, I won't even hold it to you, but I would love to be inspired by your crafts.  Send me photos or comments too! 

Tuesday, February 11, 2014

A Craft A Week: Week 4 - Yarn Letters and Fabric Horse

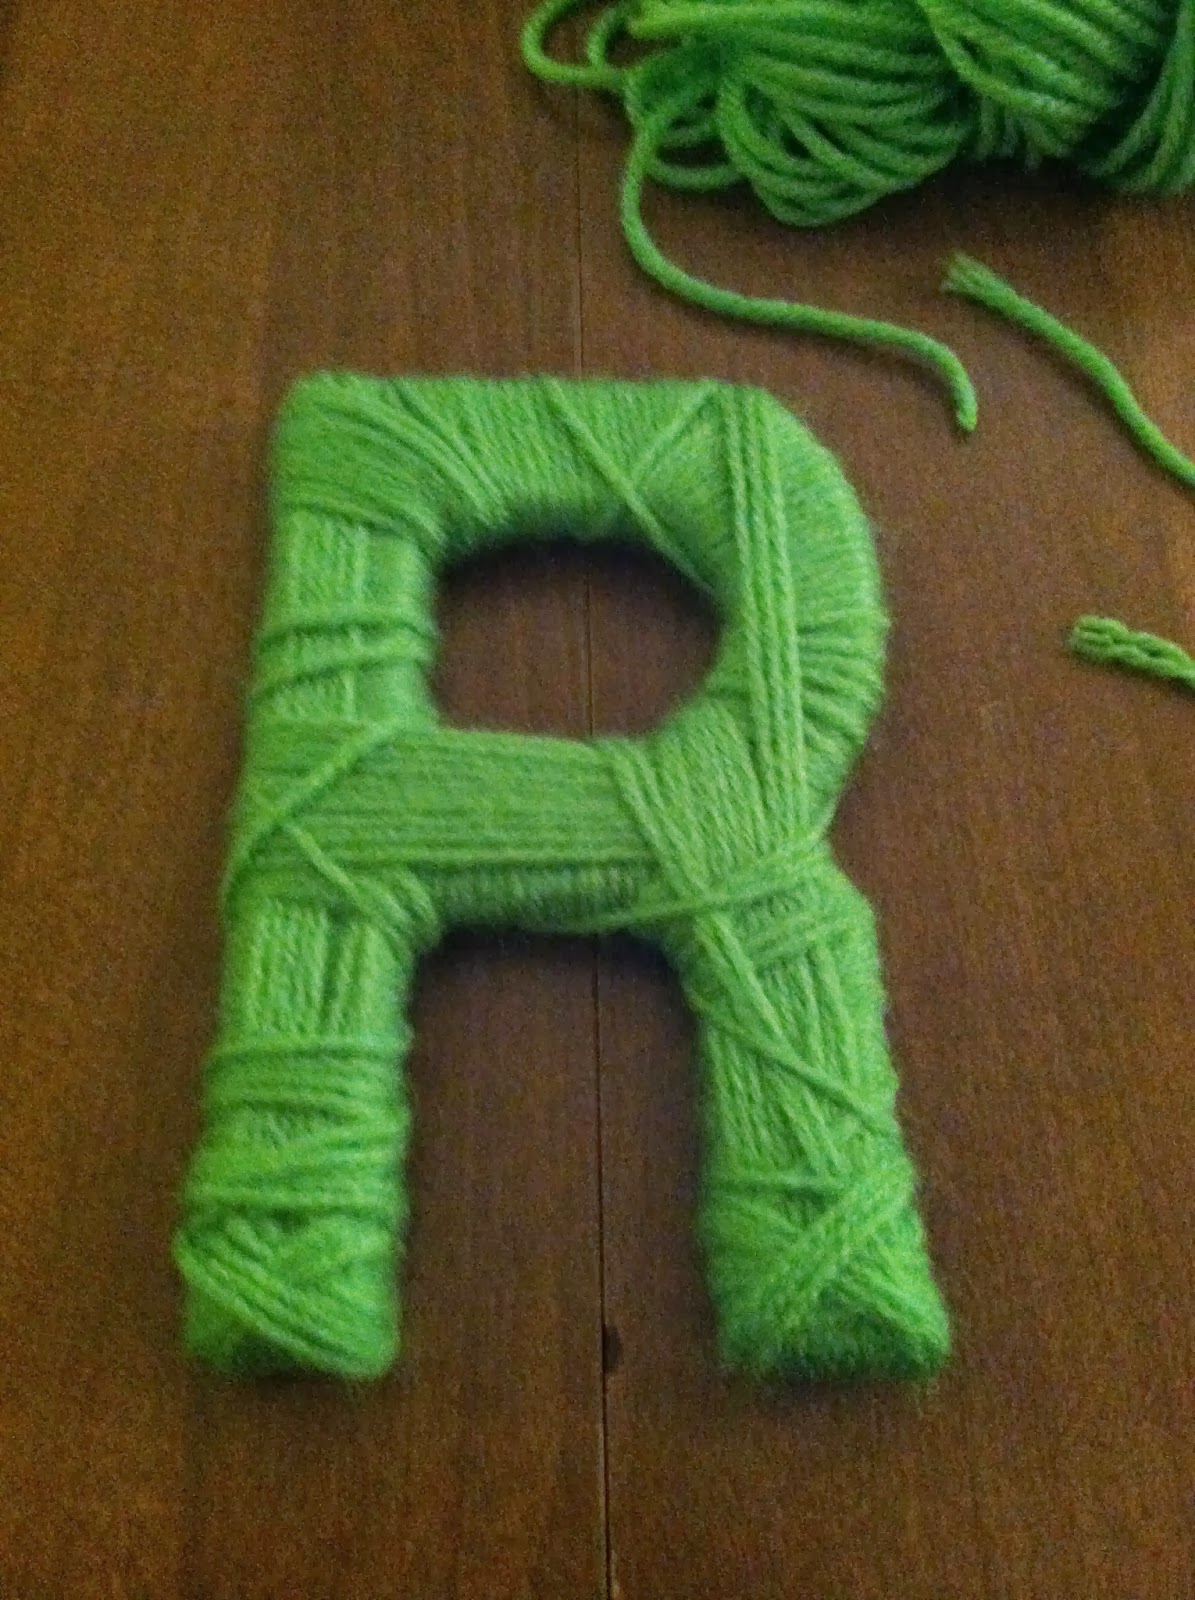
This week I had two projects I wanted to tackle: decorating block letters for my youngest sons bulletin board and making a fabric horse as a joke for my desk at work.  I started with the letters first.  I bought the letters at Michael's in the wooden projects isle.  I got the idea to wrap them in yarn when I was looking through the September (I think) issue of Parents Magazine.  There was an article about 12 Fun Alphabet Activities to do to help your kids learn letters.  Here is the photo:


The yarn was gifted to me by my good friend Dawn.  So I started with the R and wrapped the yarn tightly, making sure none of the wood showed through.  I tried to make sure the lines weren't perfectly across or up and down so that I could get weird on the other letters and it wouldn't be as noticeable.  I tied off the yarn at the end and switched to the next letter, different color yarn.


Wrap, wrap, wrap, fun, fun, fun, hit your neighbor on the thumb; wrap, wrap, wrap, now you're done! 

 
All I did next was heat up the ol' glue gun and plop out some glue on these bad boys and stick them to the board.  Project complete!
 
 
My next project was the horse project.  So the inspiration for this project came from a joke at work about calling myself the Red Horse and then I went to Amazon to search for silly Red Horse items and saw a cute plushy, which then led me to Etsy where I found this one:
 
 
So I found some red fabric in my craft closet and sketched out a quick version of this cute horsey, cut him out and stupidly hand stitched him together.  Reed picked out some yellow heart shaped button eyes from our button bag (those had to go immediately) and then he asked me to give the horse a mouth and then we stuffed him and gave him yarn hair...
  
 
He is so ugly he is cute?  I can't take this little guy to work.  No.  Nope.
 
If I had wanted to make it better:
Yarn Letters: I don't think I could have done better, they're awesome!
Fabric Horse: Where do I start! Pick a better fabric (felt or fur even!), the sewing, the stuffing, the hair!  Ok, ok, well I should NOT have hand sewn this little dude together.  Although it is my preference to sit on the couch and do a quick sew job, this would have turned out a lot better had I used my sewing machine to get a cleaner line.  Then, what's with the white yarn hair!  What was I thinking!
 
Final thoughts:
The yarn letters were super fun, I want to make something else like it!  (This was probably my downfall with the horse).
Both projects were fast and easy.
Chase really liked the letters.  I told him he could do his letters on his bulletin board like that and he said, "No, I wouldn't want you to have more work to do".  I think he missed the part where I said "he" could do it.  Blake said the letters were, "Cool!".  Reed wanted to play with his letters until I glued them on the board and now he's forgotten they exist.  Perfect!  As for the horse... it's hiding so the kids can't give me a critique.
 
My next project:
Well it is Valentine's week and for the last few years I've made the cards I give my guys (husband and 3 boys) so this year my friend Dawn (Geesh I mention her a lot) gave me the idea "I Love You to Pieces".  Will you join me?  If you do, send me a picture of your homemade Valentine's cards.  This is where I will get my inspiration:
 
 
..and for my husband I plan to BLAST "I Fall To Pieces" by Patsy Cline first thing in the morning to wake him up!
 

Friday, February 7, 2014

A Craft A Week: Week 3 - Finger Knit Pillow

Hello!  This is my first post on my new blog.  For the past few weeks I've been challenging myself to do a craft a week.  My goal is to keep it up for a year, use up supplies I already have on hand to clean up my craft closet, and finally tackle those projects I've always wanted to try and just don't start.

I first started with presenting the idea to my friends and coworkers via email.  I thought I would share my project while also creating a social time and invited them all over to join me at my house that weekend.  No takers, but then I started thinking it would be fun if my friends and family far away could join too, so I started posting my progress on Facebook.

But alas, neither of those places are a good place to document and share photos like this (the email was my work email and I felt inaproprate posting there and Facebook always gives me grief with new photo uploads).  So here I am and let the Week 3 results commence! 

My craft was a Finger Knit Pillow.  The idea I first had was to combine both of the below ideas in one pillow: all red knit on one side with black spots (Lady Bug style) and all black knit on the other side with a red knit "Love" on the other.  Here are my inspiration photos and where I found them:


I found both these photos on Pinterest.  I couldn't link to the original site the knit pillow with green and white strips came from, so I don't know who to credit for that beautiful pillow.  The Love pillow came from http://craftgawker.com/post/2013/01/30/44139/.  CraftGawker refers to this pillow as the Tasseled Finger Knot Love Pillow.
 
By mid-week, also known as Wednesday, I posted the following photos on Facebook:  I had thought I should make a pillowcase to attach the knitting to and then stuff the pillow inside.  I grabbed some scrap fabric I had in my craft closet, ugly weird snakeskin fabric I had found at Big Lots to make a bead bag (that I never made).  This is it, inside out, with the pillow stuffed inside.

 
These next photos show the knitted strands I was making.  I had this stupid yarn I bought for $1.00 at Joann Fabrics that alternated red and black, but I only wanted one color for each side of the pillow so as I knitted, when the color would change I would stop, cut, and start a new strand.
 
 
On Thursday I started playing around with all the pieces to see how it would all come together.  Immediately I realized the pillow case idea was NOT going to work.  You could see right through the yarn and see the ugly snakeskin fabric.  So, I decided to switch ideas and go buy some red and black felt. 

On Friday I went to the store for my felt and spent the evening stitching the red strands to a piece of red felt.  LOVE IT!  It’s smaller than I originally wanted and I also began to realize that I didn’t want both sides to be knitted.  I was going to make two pillows: one with red strands on red felt with black dots and a black felt back, and one pillow with black strands on black felt with LOVE stitched to the other side (red felt).

On Saturday I decided that wasn’t going to happen either.  I was only going to be able to accomplish one pillow over the weekend and since I had already started the red with black dots, that was the pillow I was going to show you on Monday (or now Friday via this blog).  So, here it is!  The finished project:


Ideas to make it better:
1.  Most important: use better yarn!  I used the yarn I had bought to learn how to finger knit, before I even thought of making a project.  Had I used good quality, thicker, softer yarn, I think it would have turned out better.
 
2.  Also important: use one color yarn or whatever to make a really long strand so you don't have to keep stopping, starting, tieing, cutting, etc.  It also saves time when attaching the strands to the felt.
 
3.  Find a better way to stitch the knitting to the pillow.  Use a sewing machine?

Final thoughts:
It's so cute!  My oldest son Chase told me I should add antenna and make it look more like a Lady Bug.  My friend Dawn told me I could easily make it in to a Pillow Pet, I just love that idea, but again, I would have wanted to use softer cuddly yarn.
 
Next Week's Project:
Yarn covered letters for my youngest son Reed's bulletin board AND a fabric horse!  When Chase (oldest) and Blake (middle son) moved in with me I made them each a bulletin board with hand painted foam letters spelling out their names.  They still have their boards and fill them up with artwork, knicknacks, cards, etc.  When Reed got his own bedroom I bought him a bulletin board too, but I hadn't made his name.  Then I saw these yarn letters in Parents Magazine!  As for the horse it is just to be silly.  It is the Year of the Horse and my Chinese Zodiac sign IS the Horse, but mostly I wanted to make it because of work.  I am in a team at work and part of the team name is "Colt", so I was silly and made a spinoff of that and another team I am a part of and called myself the "Red Horse".  Stupid, but I figured I could make a dorky red horse for my desk.  We shall see what time allows.
 
 
The horse is from Gypsy Garden, www.gypsygarden.etsy.com: